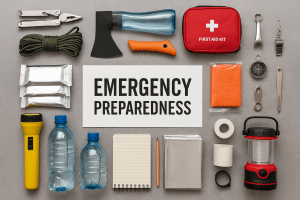
It’s just you and me here right now, so let’s be real with each other. Despite countless reminders to do so, building an emergency kit in Canada is one of those things we mean to do… but somehow keeps falling to the bottom of our to-do list, right between “clean out the junk drawer” and “will I have enough money to retire.” But with natural disasters, pandemics, and supply chain surprises now routine parts of the Canadian experience, it’s time we all take this seriously. Whether you call it a bug-out bag, a 72-hour kit, or just your “oh crap” bin, here’s how to start, or upgrade, your emergency preparedness in a way that actually fits your life.
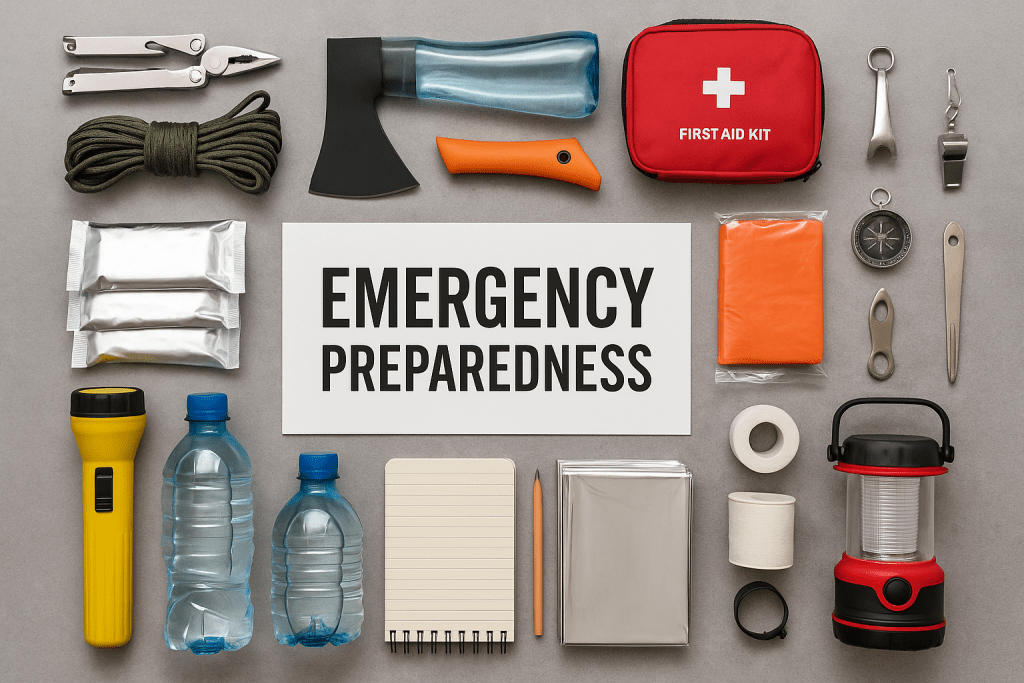
Why You Need an Emergency Kit in Canada
Let me put it this way: a few months ago, my small community put up a sign—just a simple board that shows the current fire risk level. I’ve lived here for over 20 years, and we’ve never had one before. This summer? It’s already hit “extreme risk” a couple of times. That sign is more than just a literal sign—it’s a sign o’ the times. A flashing reminder that disasters aren’t something that happen somewhere else anymore.
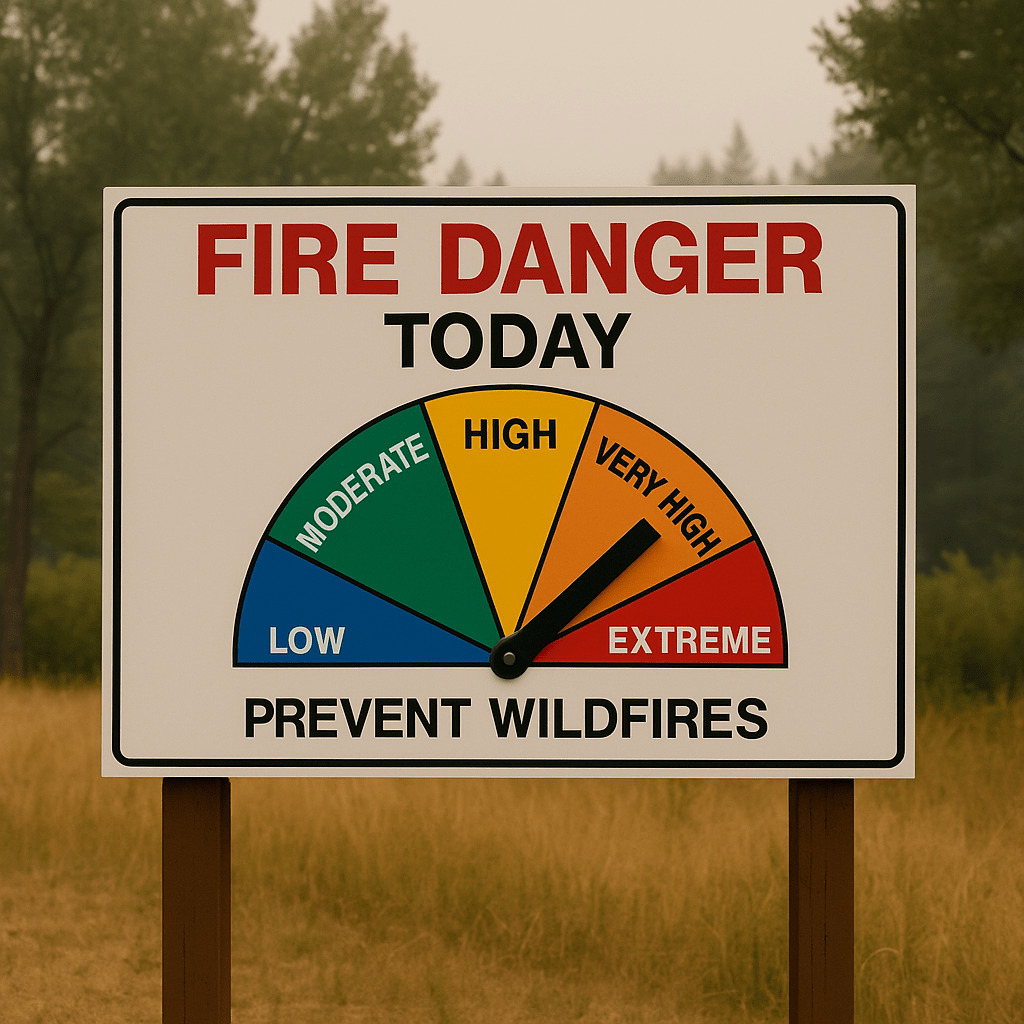
Wildfires, power outages, ice storms, floods… pick your poison. Canada’s not immune, and the reality is help might not always be available right away. So, if we want to be the adultiest of adults, it’s time for some grown-up planning.
Start Your Emergency Kit Canada Prep on a Budget
You don’t need to hit up MEC and drop your entire paycheque to be “emergency ready.” The key is to start, and build as you go. Pick up a few extras every grocery trip. Watch for sales. Use what you have. Progress, not perfection is the path.
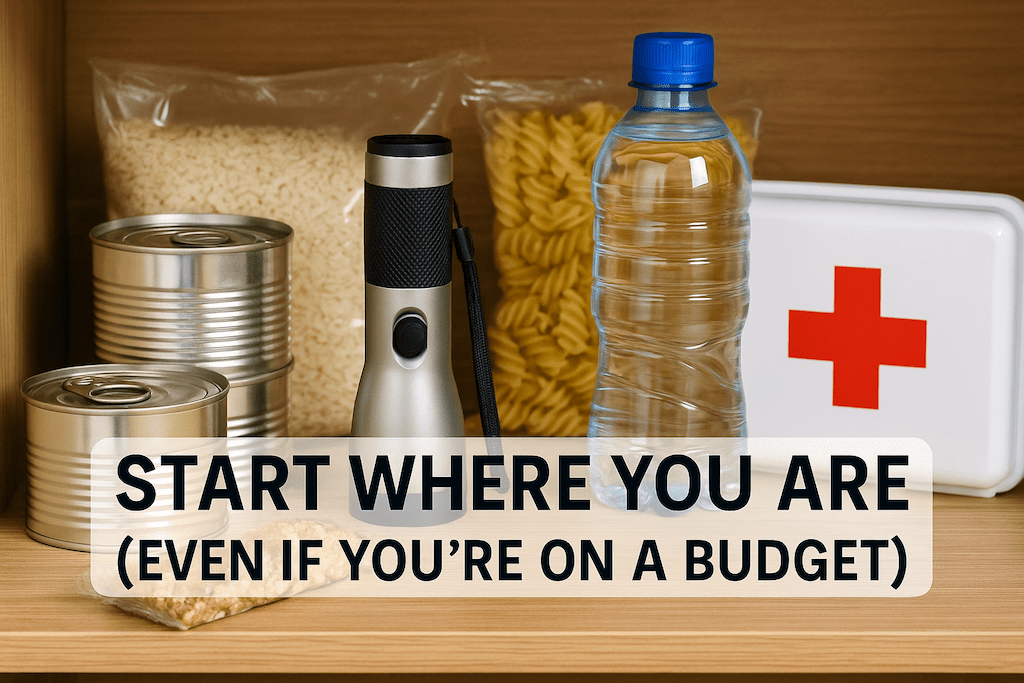
A half-ready kit is better than nothing. That granola bar and flashlight you tossed in a bin six months ago might make a huge difference if the lights go out or you’re told to evacuate in ten minutes.
Check and Refresh Every Six Months
Set up a recurring reminder in your calendar, in fact make it the same day you check the batteries in your smoke detectors and change your clocks, because you are an efficient, lean-mean disaster preparedness machine. Here’s what to check for:
- Toss expired meds
- Check expiry dates on food and water
- Test flashlights and replace batteries
- Update anything that’s changed (new pet? kid out of diapers? meds? change insurance providers?)
Where Should You Keep Your Emergency Kit?
You don’t want to be digging through your basement during an emergency or gathering your items from multiple rooms. I don’t want to put you in a state of panic, but really think about having five minutes to grab what’s important to you: people, pets, medications, chargers, documents. That’s it. That’s the window. The more scattered your essentials are, the more likely you are to forget something, or worse, someone, when every second counts.
So where should it live? Ideally, near your most-used exit—a front hall closet, mudroom, or garage shelf works well. If you’re rural or prone to power outages, consider keeping a mini version in your car too.
As for what to pack it in, it depends on your setup:
- Backpack: Easiest to carry, hands-free, and ideal if you might need to evacuate on foot.
- Tote or duffel bag: Great for tossing in the car. Just make sure it’s sturdy and has decent straps or wheels.
- Storage bin: Best if you’re prepping for a group or sheltering in place. It’s not exactly grab-and-go, but it keeps things organized.
You might even want a combo: a bin at home with everything, and a smaller go-bag with just the essentials you’d need in a rush. The key is easy access when panic sets in.
Emergency Kit Canada: Three Levels of Preparedness
You don’t have to go full doomsday prepper. Pick the level that fits your life right now—and grow from there.
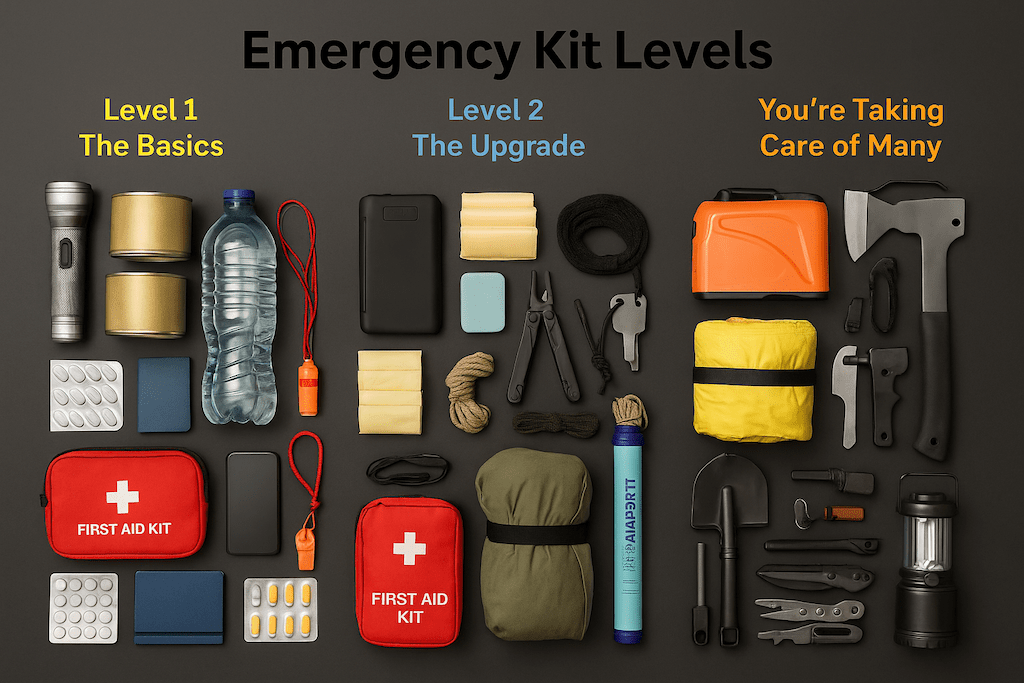
Level 1: The Basics (Better Than Nothing)
- Flashlight + batteries
- 4L water per person per day (3-day supply)
- Canned food or granola bars (plus can opener if needed)
- First aid kit
- Copies of ID, insurance info
- Phone charger
- Blanket or emergency foil wrap
- Medications
- Whistle
- Printed local map
The Government of Canada has a basic emergency kit list to help you get started. Use it as a guide and build on it based on your needs.
Level 2: The Upgrade (You’re Paying Attention)
- Emergency radio (hand crank or solar)
- Battery bank for your phone
- Pads, tampons, and other hygiene items
- Pet food and leash
- Multi-tool, duct tape, paracord
- N95 masks
- Work gloves
- Waterproof matches or lighter
Level 3: You’re Taking Care of Many (and You’re a Legend)
If you’re prepping for a group, living in a rural area, or just like to be over-prepared (respect), this level takes your kit from solid to seriously capable. These are items that help you handle longer emergencies, outdoor survival, or helping others.
- Generator or solar power station
- Camp stove and small propane or fuel canisters
- LifeStraw or water purification tablets
- Sleeping bags and a tent or tarp
- Rain ponchos or raincoats
- Large, well-stocked first aid kit (with scissors, tweezers, wound dressings, tourniquets, pins, cotton buds)
- Multifunctional axe or heavy-duty multitool
- Folding shovel
- Fire starter (magnesium block or striker)
- Lantern or headlamp
- Entertainment for kids or anxious adults (cards, books, etc.)
- Extra fuel (stored safely, obviously)
- Emergency contact sheet for every family member
- Printed paper map (yes, the kind that folds)
- Compass — and ideally, knowing how to use it, because newsflash: north isn’t directly in front of you like I used to think
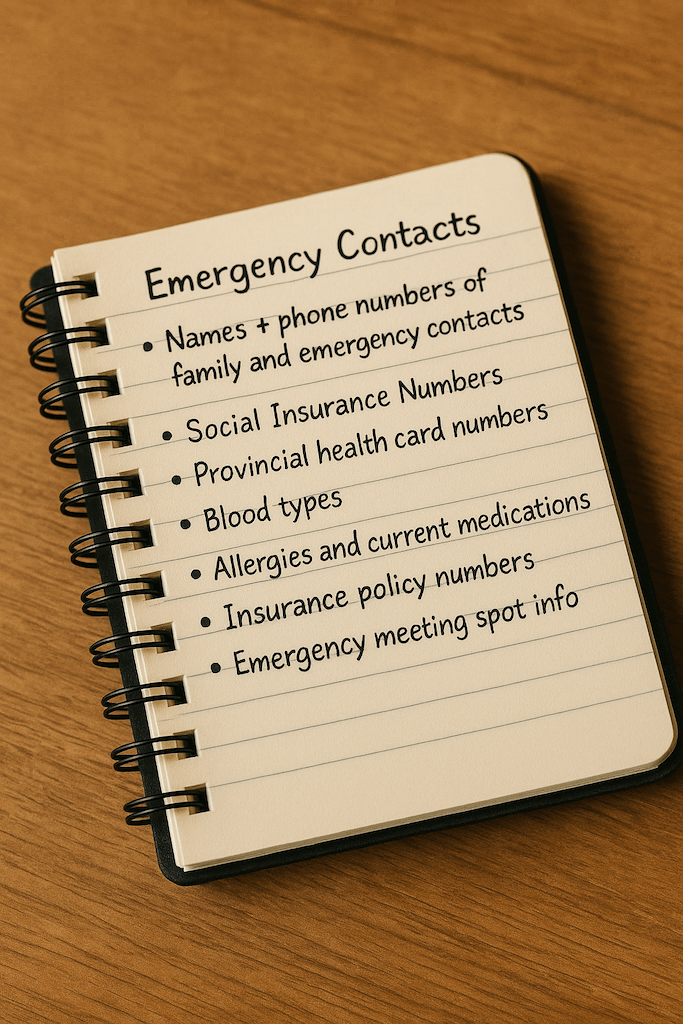
Don’t Forget the Little Black Book
Your emergency kit should keep you alive, but your little black book helps you function and should be in any type of emergency kit you prepare.
We’re so used to trusting that everything’s stored in our phones or in the cloud, but what happens when there’s no signal, no battery, or the system is down?
Grab a small notebook (seriously, paper and pen) and write this stuff down:
- Names + phone numbers of family and emergency contacts
- Social Insurance Numbers (yours and your dependents’)
- Provincial health card numbers
- Blood types
- Allergies and current medications
- Insurance policy numbers
- Emergency meeting spot info if you’re separated
- Banking or utility account numbers (not passwords—just identifiers)
Keep it in a sealed Ziploc in your emergency kit. And yes—update it every six months like you do the rest of your kit.
The “If There’s Time” Bag
This won’t help you survive—but it might help you stay grounded if everything else falls apart.
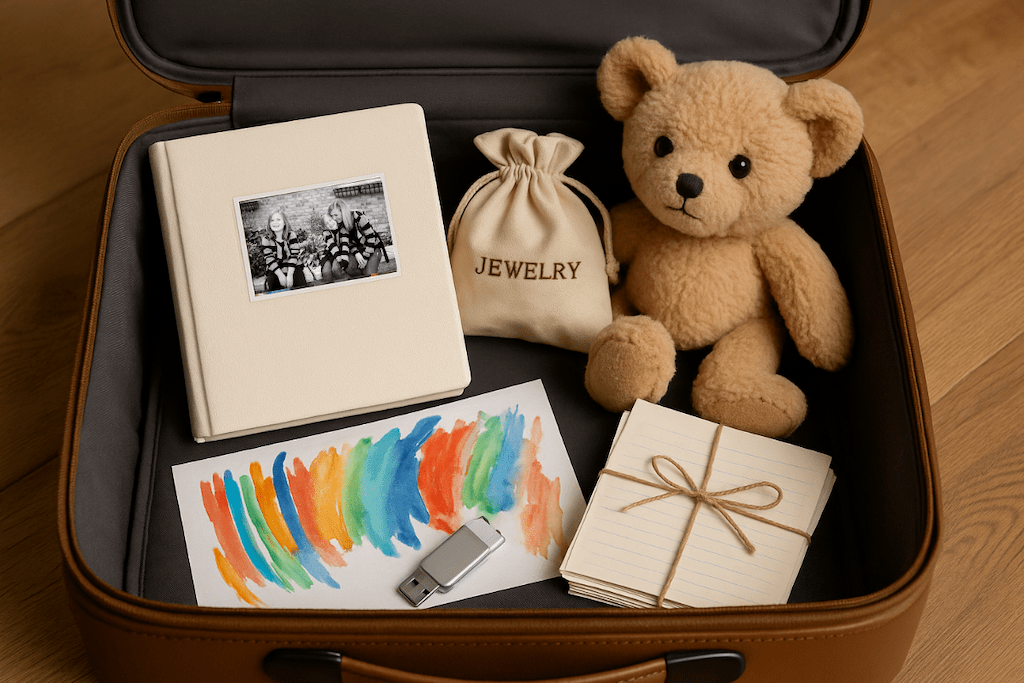
If you have a few extra minutes, have a pre-packed bag (or small suitcase) with the things that matter to your heart, not just your head:
- A small photo album or USB key with scanned family photos
- Sentimental jewellery or heirlooms
- Letters, keepsakes, or items with meaning
- A copy of your kids’ artwork
- A comfort item (stuffed animal, favourite book, etc.)
This isn’t your top priority in an emergency—but if you’ve got space in the car and seconds to spare, this is the bag you’ll never regret grabbing.
You don’t need to become a scout leader, but a little training goes a long way in a crisis. Consider adding one of these to your “I should probably do that” list:
- Basic First Aid + CPR – offered by the Red Cross, St. John Ambulance, and local rec centres
- Wilderness First Aid – great for campers, hikers, and rural folks
- Map and Compass Navigation – some MEC stores, outdoor clubs, and even YouTube offer intro lessons
- Emergency Preparedness Webinars – your local municipality may offer these seasonally for free
Download the Printable Checklists
Want everything in one place? This printable emergency kit Canada checklist has everything you need to feel prepared. Download the free PDF with:
- All three emergency kit levels
- Little Black Book essentials
- The “If There’s Time” sentimental bag list
 This Frozen Maple Coffee Is the Most Canadian Way to Stay Caffeinated