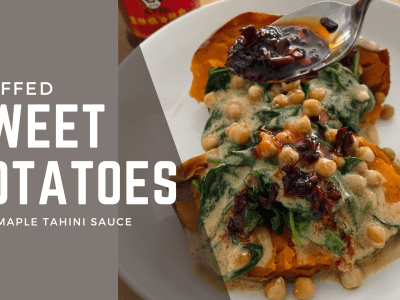
Oven Fried Chicken – In It’s Birthday Suit

I love my Mom’s oven fried chicken. First, she removes all the skin and still serves up this incredibly crispy, juicy chicken that is way better than it’s deep fried alternative and has a lot less fat. It’s delicious hot. It is also excellent cold and is a perfect make-ahead picnic food, served with a classic Macaroni Salad of course.

This recipe calls for eight legs and eight thighs but you’re going to want to double or triple, heck quadruple it maybe, if making for a crowd. If you make this through the week plan to have it for supper and then send everyone with cold chicken the next day for lunch.

oven fried chicken

Oven Fried Chicken

1/2 cup all-purpose flour
2 tsp kosher salt
1 1/2 tsp garlic powder
1 tsp paprika
1/2 tsp pepper
1/4 tsp dry mustard
8 chicken legs and chicken thighs
1 tbsp vegetable shortening

Preheat oven to 375F. In a pie dish, mix flour, 1 tsp (5ml) of the salt, the garlic powder, paprika, pepper and mustard. Rinse chicken and remove skin, sprinkle chicken with remaining teaspoon of salt and then coat chicken in flour mixture. Grease rimmed baking sheet well with vegetable shortening and place chicken on sheet. Bake in oven, basting occasionally with pan drippings. Tilt pan to get drippings if need be or add a tad more vegetable shortening if not enough drippings. Baked until golden and juices run clear about 1 hour.

oven fried chicken naked

Print Friendly

Homemade Baked Beans

Beans beans the magical fruit, the more you eat the….ooops, pardon me, that just slipped out.

I can’t help it. Today I made these incredible homemade baked beans and I am reaping the rewards. Stinky farts you ask? Well yes silly, because there’s release in that if done when no one is around to hear it. Also beans are super good for you, helping to lower blood cholesterol levels and blood pressure to name two. Finally, they’re a comfort food that’s good all year round. Homemade baked beans are good with eggs for breakfast, lunch in a thermos, dinner with a ham or alone with warm bread. Beans are also great for parties to put out on a buffet table and are fabulous cold at a picnic. They really are the magical fruit.

homemade baked beans

These beans for made from scratch, but are stupid easy. However, if you are in a huge rush, you can try these Coffee Beans & Bacon I shared over at Ghetto Foodie.

Homemade Baked Beans

1 lb white pea beans or navy beans
5 cups cold water
6 bacon slice
2 small onions, sliced thinly
3 garlic cloves, minced
2 tsp. sherry vinegar
1 1/2 tbsp. brown sugar
1/2 tsp. prepared mustard
1/4 cup molasses
1/4 cup ketchup
1/4 cup chili sauce
More water to cover beans while baking.

homemade baked beans for dinner

Rinse beans and remove any bad ones. Soak in cold water overnight in a large bowl. Drain.

Place beans in large pot and pour 5 cups of water over them. Cover and bring to boil, then turn to low and simmer for 30 minutes or until almost soft. Meanwhile in large Dutch oven, cook bacon until crisp. Remove, leaving bacon grease behind, and tear into bite size pieces. Over medium-high heat, cook sliced onions and garlic until starting to turn a light golden colour. Remove from heat. When beans are done, drain and then pour into Dutch oven. In a small bowl, mix together sherry vinegar, brown sugar, prepared mustard, molasses, ketchup and chili sauce. Pour over baked beans and stir well. Sprinkle bacon pieces on top and cover with enough water to cover beans. Cover and place in 250 F oven for 6 to 7 hours. Check beans occasionally through to the day to see that they are not drying out and add more water if necessary. Remember you want the sauce to be thick though and not too runny so don’t overdo it.

Pleasantville Note: Do not, I repeat, do not put your head under the covers at night. You’ve been warned.

Print Friendly

Pub-Style Chicken Curry

Last February, I posted a recipe for Butter Chicken. At the time I was trying to embrace my family’s love of Indian food, while still grappling with my dislike for curry. Butter chicken was my “compromise”. Through the year though I would pick at my husband’s chicken curry while dining out here and there and gradually, I started to develop a taste for it. I dare say, a craving for it.  A couple of weeks ago, I took the plunge and ordered my own plate of pub-style chicken curry at our local haunt and almost licked the bowl clean, it was that good.

pub style chicken curry

[Read more...]

Print Friendly

Slow Cooker Beef and Tomato Stew


If I keep feeding my husband these amazing meals out of my laundry room, he may never finish my kitchen. Must stop.

This recipe however, was the bomb. Perfect for a cold winter day.

Slow Cooker Beef and Tomato Stew

2 lbs stewing beef
1 tbsp extra-virgin olive oil
1 large yellow onion, diced
3 medium carrots, cut into 1/4 inch pieces
3 celery stalks, cut into 1/4 inch pieces
1 can San Marzano crushed tomatoes
1 cup low-sodium beef broth
4 garlic cloves, peeled and smashed
Kosher salt and ground pepper

In a large skillet, heat oil over medium heat. Add onion, celery and carrots and cook, stirring often, until vegetables are soft. Transfer to slow cooker and add beef, tomatoes, broth, garlic, salt and pepper.

Cover and cook on low 6-7 hours, or high 4-5 hours. Spoon over Pappardelle or Fettucine. Sprinkle pinch of kosher salt and chopped fresh parsley on top before serving.

Pleasantville Note – I can not emphasize enough the use of San Marzano tomatoes. They simply burst with flavour and all others seem bland in comparison. Also, we typically buy whole tenderloins and then cut steaks and roasts from it. We always have enough leftover for delicious stews! You can refrigerate this in an airtight container for up to 3 days and freeze for up to 3 months.

*adapted from an Everyday Food recipe.

Print Friendly

Clubhouse Flavourful Recipe Mix

Whenever I’m asked to try a product that is going to save me time, I like to put it to the test. Trying it when I have scads of time on my hands defeats the purpose, right?

Clubhouse has come out with this new Flavourful Recipe Mix, complete with an easy recipe on the back of the package that is supposed to be fast, easy and delicious. On Saturday, after running around doing errands with two hungry kids, I thought, maybe I’ll just grab a pizza on the way home. Then I remembered all the Clubhouse seasonings I had to try at home. I called my husband and got him to read off what I needed at the grocery store: one triple A steak, broccoli, and a red pepper (I had everything else I needed at home).

Time to wok’ N Roll. (oh I slay me)

Clubhouse Lemon Ginger Beef Stir-Fry

1 package Clubhouse Lemon Ginger Beef Stir Fry Flavourful Recipe Mix
2 tbsp vegetable oil
1 lb boneless beef, cut into thin strips
1 carrot, thinly sliced on the diagonal
2 1/2 cups broccoli florets
1 red bell pepper sliced
1 tbsp corn starch
1 tbsp soy sauce
1 cup water

Heat oil in a large skillet (or wok) over medium high heat. Add beef and stir-fry 3 minutes. Add seasoning and vegetables. Stir-fry until tender-crisp, 5-7 minutes. Stir together corn starch and soy sauce. Add to pan with water. Stir-fry another 1-2 minutes or sauce is thickened. Serve over rice or noodles.

So, what’s my bottom line on this? It really is fast, easy and delicious. The aroma of all the spices in the bag is heavenly. It also, I might add, save me some serious coin. I fed my family a bang up meal for just over $3 a serving. I’m looking forward to trying the others.

Want to try Clubhouse Flavourful Recipe Mix for yourself? Check out this great coupon offer when you buy any two Clubhouse gravies, you get a 1 Club House Flavourful free! You can also win a 10-piece cookware set over at Clubhouse.Ca.

Finally, I have a giveaway too! You can win a Clubhouse prize pack PLUS a $50 giftcard to help out with the groceries. How nice is that?

Here’s what you need to know.

Open only to Canadian Residents. Readers may apply across many blogs but may only win once.

a Rafflecopter giveaway

Disclosure – I am participating in the Club House Flavourful Recipe Mixes Blog Tour by Mom Central Canada on behalf of McCormick. I received compensation as a thank you for participating and for sharing my honest opinion. The opinions on this blog are my own.

Print Friendly

Bean Burritos

We’ve been making these Bean Burritos from Martha Stewart’s Everyday Food for years now. They are so easy to make and because they are frozen in single servings, they are great for a late night snack for someone or for me when I want something quick for lunch. These are also perfect for meatless meals.

Bean Burritos

3/4 cup rice (brown or white)
2 tablespoons olive oil
2 medium onions, chopped
4 garlic cloves, chopped
1 jalapeno chile, chopped (ribs and seeds removed, for less heat)
1/2 teaspoon ground cumin
Coarse salt and ground pepper
3 tablespoons tomato paste
3 cans (15 ounces each) pinto beans, drained and rinsed
1 bag frozen corn kernels (10 ounces)
6 scallions, thinly sliced
8 burrito-size flour tortillas, 10 inches each
2 cups (8 ounces) shredded Monterey Jack cheese
Salsa and sour cream, optional

Cook rice according to package instructions; set aside.

Meanwhile, heat oil in a large saucepan over medium. Add onions, garlic, jalapeno, and cumin; season with salt and pepper. Cook, stirring occasionally, until golden, 10 to 12 minutes. Add tomato paste, and cook, stirring, 1 minute. Add beans and 1 1/2 cups water; bring to a boil, reduce heat to medium, and simmer, stirring occasionally, until thickened, 10 to 12 minutes. Add corn; cook to heat through, 2 to 3 minutes. Remove from heat; stir in scallions.

Heat tortillas according to package instructions; fill with rice, bean mixture, and cheese.

Mound 1/4 cup rice, 3/4 cup bean mixture, and 1/4 cup cheese on one side of tortilla. (I like to go more rice, less beans but follow your heart) Fold sides, and hold them in. Starting from filled end, holding sides in as you work, tightly roll into a bundle. Place on a baking sheet, seam side down, and prepare remaining burritos.

Serve immediately, with salsa and sour cream, if using, or wrap per freezing instructions.

Freezing Instructions:
Wrap individually in plastic and freeze up to 3 months.

To reheat from frozen:
Remove frozen burritos from plastic wrap. Place on a microwave-safe plate; microwave on high for 3 minutes. Transfer to baking sheet; bake at 450 degrees until crispy, about 10 minutes.

If only using a microwave, remove from plastic wrap, and place on a microwave-safe plate, covered with a microwave safe bowl. Defrost at high power for 3 to 4 minutes; uncover, and microwave on high 3 to 4 minutes longer.

If only using oven, remove burritos from plastic wrap; rewrap individually in aluminum foil. Place on a baking sheet; bake at 450 degrees for 40 minutes. Remove foil, and bake to crisp, 5 to 10 minutes. (To reheat defrosted burritos, remove any wrapping and bake for 10 minutes).

Pleasantville Note: I used mixed beans for this recipe and cut back slightly on the beans, using only two 19 oz cans. I also double the rice. Finally, I get my husband to make up his own tortillas because they are way better than store bought.

Print Friendly

Chicken, Leek and Lemon Pie

Yesterday I ironed. Yes, ironed. The very worse chore in the whole history of the earth. And because I had let it pile up since May or something like that, I figured I better get to it. This, of course, meant that my husband was tasked with making dinner. He pulled out a family favourite and I told him that yes, I would give him complete credit, lest he run off and start his own blog.

Chicken, Leek and Lemon Pie

2 tbsp (25 mL) olive oil
2 tbsp (25 mL) lemon juice
1 1/2 lbs (750 g) boneless, skinless chicken breasts
Salt and freshly ground pepper

Filling:
12 cloves of garlic, unpeeled
3 leeks
1/4 cup (50 mL) butter
1/4 cup (50 mL) flour
2 cups (500 mL) chicken stock
1 tbsp (15 mL) chopped fresh tarragon or 1 tsp (5 mL) dry
2 tbsp (25 mL) lemon juice
1 tsp (5 mL) grated lemon rind
1/4 cup (50 mL) whipping cream
Salt and freshly ground pepper
3/4 cup (175 mL) green peas, defrosted if frozen
1 No Fail Pastry (recipe below)
1 egg, beaten with a pinch of salt

Combine oil and lemon juice. Toss with chicken breasts. Season with salt and pepper. Preheat broiler or use grill pan. Broil breasts 5 minutes per side or until still slightly pink in centre. Cool. Cut into 1 1/2-inch (4-cm) dice and reserve.

Preheat oven to 375°F (190°C). Place garlic in cold water, bring to boil and boil for 5 minutes. Drain and peel garlic. Reserve. Cut dark green leaves from leeks and discard. Wash leeks well and slice into 1/2-inch (1-cm) sections.

Heat butter in skillet on medium heat. Add leeks and garlic and sauté for about 3 minutes or until leeks soften. Stir in flour and cook until pale gold, about 4 minutes, adding more butter if needed. Stir in chicken stock, tarragon, lemon juice and rind. Bring to boil. Add cream, reduce heat and simmer for 5 minutes or until thick and glossy. Season well with salt and pepper.

Stir in green peas and chicken. Place in a 6-cup (1.5-L) baking dish or individual baking dishes. Roll out pastry 1/4-inch (5-mm) thick to cover top of dish. Cut a 1-inch (2.5-cm) strip from edges of pastry. Brush edges of dish with water and lay strip around edges. Brush with egg. Lay remaining pastry on top, sealing edges. Cut a steam hole, decorate with any extra pastry cut in shapes, if desired. Brush with egg.

Bake pie on middle shelf of oven for 30 to 35 minutes or until pastry is golden and mixture bubbles.

No Fail Pastry

3 cups (750 mL) all-purpose flour
1 1/2 tsp (7 mL) salt
1/2 cup (125 mL) cold unsalted butter, cut in 8 pieces
1/2 cup (125 mL) cold vegetable shortening, cut in 8 pieces
1/3 cup (75 mL) cold water
2 tbsp (25 mL) white vinegar

In a bowl, combine flour and salt. With a pastry blender or fingers, cut in butter and vegetable shortening until mixture resembles bread crumbs. Combine water and vinegar and sprinkle over flour mixture a little at a time tossing together with a fork until the pastry is moist enough to hold its shape when a little piece is pressed between the fingers. Gather pastry into a ball – it should not feel sticky.
Flour the counter or pastry board lightly. With a floured rolling pin, roll the pastry out into a rectangle approximately 8 x 12-inches (20 x 30-cm). Fold the pastry into thirds like a letter. Turn the dough so the open edges face you and roll out into a rectangle again. Repeat this procedure again. Cover dough with plastic wrap and chill one hour. For smaller pies, use half the dough, larger ones need two thirds or all of it. Freeze any remaining dough for another occasion. Dough should be rolled out 1/4-inch (5-mm) thick.

Pleasantville Note: This recipe was pulled from a 2000 issue of Food & Drink. I’ve always found Chicken Pot Pie a little dull until I tried this. Now this is the only recipe we do. Delicious. Don’t stress if you don’t feel like making pastry. You can cheat and buy a package of puff pastry. I’ve done it both ways and it’s delicious whatever route you choose. This is supposed to serve four, but I’m going to say six, unless you have gigantic appetites of course. Serve with a nice green salad on the side.

Print Friendly

Crunchy Hawaiian Chicken Legs

The thing I love about this quick weeknight meal is everyone is happy when I put it on the table and the drumsticks are fabulous cold the next day in a lunch box. Two birds…..one stone.

Crunchy Hawaiian Chicken

1/4 cup honey
1/4 cup ketchup
1 tbs. soy sauce
1 tsp. grated ginger
3 lbs. chicken drumsticks
3 cups cornflakes, crushed to crumbs
1 can crushed pineapple

Heat oven to 375F. Line a baking pan with foil. In a large bowl combine honey, ketchup, soy sauce and ginger. Transfer 2 tablespoons of the sauce to a small bowl. Add drumsticks to the large bowl of sauce and toss to coat well. Place cornflake crumbs in a shallow bowl or pie dish, coat drumsticks with crumbs, and place in prepared baking pan. Bake 40 minutes.

Add pineapple to reserved sauce in the small bowl. Serve with baked drumsticks.

Print Friendly

Firecracker Chicken Salad

If you’re from Ontario, you know that whenever they release the LCBO magazine, Food & Drink, there’s a mad rush to get the current copy. It’s a hot commodity. Like most food magazines I get, I rarely throw one out. I keep all back issues because what doesn’t necessarily appeal to me on my first perusal might make my mouth water the next season, or as in this case, seven years later. Yup, that’s how long I had this magazine stored away.

You know how I know if a recipe is a keeper? If I want to make it again right away. That’s how I felt about this Firecracker Chicken Salad. It’s absolutely delicious and a fun meal for the summer months. It will be made again and again and again. Serve with my favourite sangria and it’s a party.

Firecracker Chicken Salad

1 tbsp (15 mL) chili powder
1 tsp (5 mL) ground cumin
1 tsp (5 mL) chopped garlic
2 tbsp (25 mL) lime juice
¼ cup (50 mL) olive oil
2 tbsp (25 mL) chopped coriander
1½ lbs (750 g) boneless, skinless chicken breasts
1 sweet onion, sliced in thick rounds
1 red pepper cut in quarters
2 zucchini cut in half
Salt and freshly ground pepper

Dressing
½ cup (125 mL) mayonnaise
¼ cup (50 mL) salsa
1 tbsp (15 mL) lime juice
2 tbsp (25 mL) chopped coriander
Salt and freshly ground pepper

Garnish
1 avocado, peeled and sliced
2 cups (500 mL) tortilla chips

1. Combine chili powder, cumin, garlic, lime juice, olive oil and coriander. Brush on to chicken breasts, onion rounds, red pepper and zucchini. Marinate for 1 hour.

2. To make dressing, combine mayonnaise, salsa, lime juice and coriander. Season with salt and pepper. Reserve.

3. Preheat grill to high. Season chicken and vegetables with salt and pepper. Place chicken breasts and vegetables on grill. Grill chicken for about 5 minutes per side or until juices run clear. Cool.

4. Grill vegetables about 4 minutes per side or until tender. Cool. Remove skin from peppers. Slice onions, peppers and zucchini into strips.

5. When chicken has cooled, slice it and mix with dressing. Add vegetables and toss to lightly coat with dressing, or serve dressing on the side. Surround platter with sliced avocado and tortilla chips.

Serves 6

Pleasantville Note: The recipe suggests serving with sliced avocado. Meh. That part was a little flat for me the first time. The second time I made it, I made my friend Tracey’s homemade guacamole and served it on the side instead. It was a fiesta my mouth.

Print Friendly

Tandoori Flank Steak with Pineapple Sauce

Whoa! Stop right there. You’re seeing sponsored post and thinking you might be moving along. Don’t.Even.Think.About.It.

Don’t leave or you’ll miss this amazingly delicious recipe from VH Sauces for your barbecue. Do I post recipes that aren’t flavour explosions for your mouth? Of course not. So trust me when I say that this flank steak will have you smiling the entire time you’re eating it. It’s such a great combination of flavours, you can’t help but moan a little with every bite.

I don’t know about you but we live outside in the summer, cooking practically every single meal outdoors. To be honest though, I’d never really thought of VH Sauces for barbecuing before until Mom Central sent out this campaign. Having previously worked with VH Sauces over at the YummyMummyClub though, I knew I couldn’t go wrong.

The first recipe I was drawn to was flank steak. If you’ve hung out here before, you know that I’m a big fan of flank. It’s relatively inexpensive and is a lean red meat. I marinated this steak for a full day before cooking in on the grill. Did I mention is was incredible?

Tandoori Flank Steak

1 1/2 lb (675 gr) flank steak
1 jar (341 mL) VH®Tandoori Sauce
1 cup (250 mL) canned pineapple chunks, drained (reserve juice)
2 tbsp (30 mL) VH® Pineapple Sauce
1/2 cup (125 mL) red pepper, finely diced
2 tbsp (30 mL) green onions, finely sliced
3 tbsp (45 mL) plus 1 tsp (5 mL) lime juice
PAM® Grilling Spray

Marinate flank steak in 3/4 cup (180 mL) of VH®Tandoori sauce, 2 tbsp (30 mL) pineapple juice, 3 tbsp (45 mL) lime juice for 6 hrs. Stir together pineapple chunks, VH® Pineapple sauce, red pepper, green onions and remaining lime juice, set aside. Wipe excess marinade from beef and discard. Spray grill with PAM® and heat to medium-high. Sear meat on both sides, then move meat to a cooler spot on the grill to finish cooking with indirect heat. While cooking, baste steak with 1/2 cup of VH®Tandoori sauce. Cook to desired doneness, about 20 minutes for medium. Remove from heat, cover with foil and let rest for 5 minutes. Slice thinly (across the grain) and serve with remaining sauce and salsa.

I can’t wait to try more of VH Sauces recipes for the grill. Next up. Cedar planked salmon. Check out their recipes here at Grill To Thrill. You can also follow VH Sauces on Facebook for updates and news. The best part though, is that VH Sauces would like to give you a chance to win a $50 gift card from Loblaws, simply for sharing what recipe you’d like to try first. After you’ve checked out the recipes from Grill to Thrill come back here and leave your favourite in the comments. Contest open to Canadian residents only and closes June 21st at 11:59:59 pm. Winner will be chosen using Random.org. Good luck!

Disclosure – I am participating in the VH Grill to Thrill Blog Tour by Mom Central Canada on behalf of VH. I received compensation as a thank you for participating and for sharing my honest opinion. The opinions on this blog are my own.

Related Posts Plugin for WordPress, Blogger...
Print Friendly