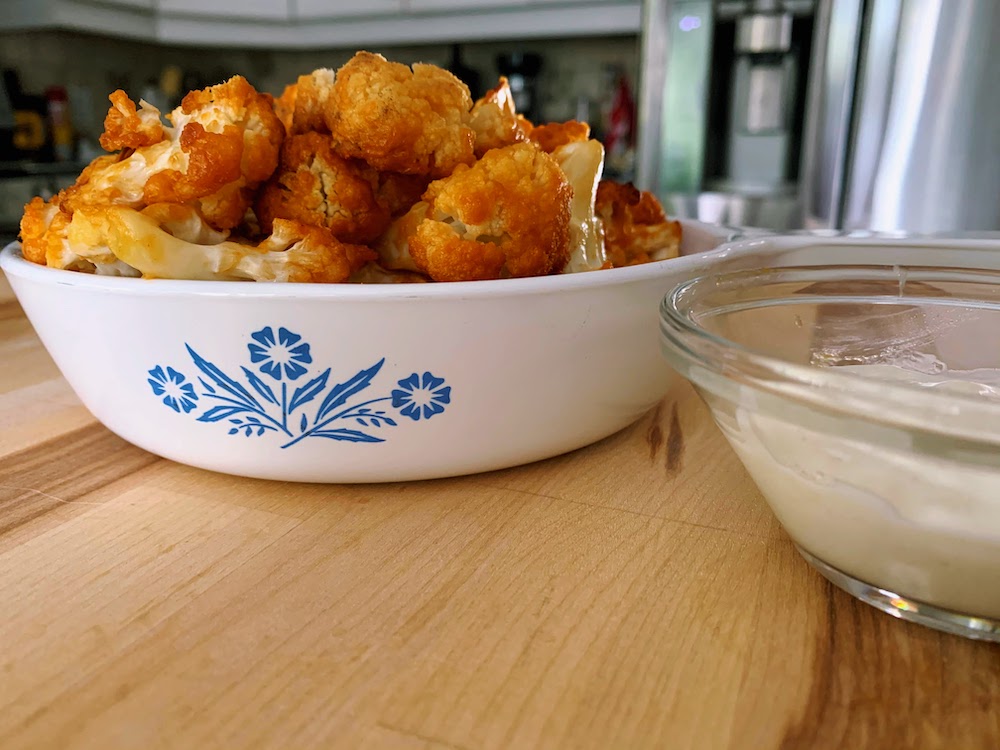
Homemade Baked Beans

Beans beans the magical fruit, the more you eat the….ooops, pardon me, that just slipped out.

I can’t help it. Today I made these incredible homemade baked beans and I am reaping the rewards. Stinky farts you ask? Well yes silly, because there’s release in that if done when no one is around to hear it. Also beans are super good for you, helping to lower blood cholesterol levels and blood pressure to name two. Finally, they’re a comfort food that’s good all year round. Homemade baked beans are good with eggs for breakfast, lunch in a thermos, dinner with a ham or alone with warm bread. Beans are also great for parties to put out on a buffet table and are fabulous cold at a picnic. They really are the magical fruit.

homemade baked beans

These beans for made from scratch, but are stupid easy. However, if you are in a huge rush, you can try these Coffee Beans & Bacon I shared over at Ghetto Foodie.

Homemade Baked Beans

1 lb white pea beans or navy beans
5 cups cold water
6 bacon slice
2 small onions, sliced thinly
3 garlic cloves, minced
2 tsp. sherry vinegar
1 1/2 tbsp. brown sugar
1/2 tsp. prepared mustard
1/4 cup molasses
1/4 cup ketchup
1/4 cup chili sauce
More water to cover beans while baking.

homemade baked beans for dinner

Rinse beans and remove any bad ones. Soak in cold water overnight in a large bowl. Drain.

Place beans in large pot and pour 5 cups of water over them. Cover and bring to boil, then turn to low and simmer for 30 minutes or until almost soft. Meanwhile in large Dutch oven, cook bacon until crisp. Remove, leaving bacon grease behind, and tear into bite size pieces. Over medium-high heat, cook sliced onions and garlic until starting to turn a light golden colour. Remove from heat. When beans are done, drain and then pour into Dutch oven. In a small bowl, mix together sherry vinegar, brown sugar, prepared mustard, molasses, ketchup and chili sauce. Pour over baked beans and stir well. Sprinkle bacon pieces on top and cover with enough water to cover beans. Cover and place in 250 F oven for 6 to 7 hours. Check beans occasionally through to the day to see that they are not drying out and add more water if necessary. Remember you want the sauce to be thick though and not too runny so don’t overdo it.

Pleasantville Note: Do not, I repeat, do not put your head under the covers at night. You’ve been warned.

Print Friendly

Slow Roasted Plum Tomatoes

Just writing the title above started my mouth watering. To me, there is nothing better than a slow roasted tomato. They are like candy on a tray. Now that tomatoes are in abundance, the time is here to slow roast them and freeze them for later use in sauces, bruschettas, frittatas, on top of steaks or on in grilled paninis. Nothing can match the flavour of a perfectly roasted plum tomato.

Book aside a day on the weekend to make these. They don’t require lots of fussing, just time.

Slow Roasted Plum Tomatoes

Half a bushel of ripe plum tomatoes
1 1/2 cups olive oil
Kosher Salt
Granulated Sugar
Head of Garlic, sliced into thin slivers
Balsamic Vinegar

Make sure racks are positioned in top third and bottom third of oven and preheat to 350F. Prepare two 12×17 rimmed baking sheets, lining with parchment paper and putting 3 tbsps olive oil in the centre of each pan. Wash and dry tomatoes and cut in half through stem. Roll each half in olive oil on tray and continue until each tray is full. Sprinkle each tomato with kosher salt, followed by a sprinkling of sugar. Place a piece or two of sliced garlic on each tomato. Drizzle balsamic vinegar over tops of tomatoes (roughly a tablespoon per tray). Finally pour half a cup of olive oil over and around all the tomatoes on one tray and repeat with other half cup on second tray.

Place trays in oven on two racks and let roast for 2 to 2 1/2 hours, switching trays half way through. Don’t worry about overcooking them, worry about undercooking them! Tomatoes should be fully collapsed and slightly brown when done.

When tomatoes have cooled, store enough in an air tight container to use that week, and put in your refrigerator. Flat pack the rest in a vacuum packed bag and freeze for use throughout the fall and winter. Good for up to six months in the freezer as long as you make sure frost doesn’t get to them.

If you’re anything like my family, you’ll probably want to eat at least half a tray straight out of the oven! Enjoy.

Print Friendly

Lobster and Shells

I am currently obsessing over dill. I simply can’t get enough. So when I came across this recipe in my Barefoot Contessa book How Easy is That?, I knew I had to try it.

Lobster and Shells

Kosher salt
Good olive oil
1/2 pound small pasta shells
Kernels from 4 ears of corn
6 scallions, white and green parts, thinly sliced
1 yellow or orange bell pepper, seeded and small-diced
1 pint cherry tomatoes, halved
1 pound cooked lobster meat, medium diced
3/4 cup good mayonnaise
1/2 cup sour cream
1/4 cup freshly squeezed lemon juice (2 lemons)
Freshly ground black pepper
3/4 cup minced fresh dill

Bring a large pot of water to a boil and add 1 tablespoon of salt and some olive oil. Add the pasta and cook it for 8 to 10 minutes, until al dente. Add the corn to the pasta and cook it for another two minutes, until the corn is tender. Drain the pasta and corn together in a colander and pour them into a large mixing bowl. Add the scallions, diced pepper, tomatoes, and lobster, tossing gently to combine. Allow to cool slightly.

In a small bowl, whisk together the mayonnaise, sour cream, lemon juice, 2 teaspoons salt, and 1 teaspoon pepper until smooth. Pour over the pasta and mix well to bind the ingredients. Stir in the dill, 4 teaspoons salt, and 1 teaspoon pepper until smooth. Cover with plastic wrap and chill for up to 6 hours to allow the flavours to develop. Check the seasonings and serve chilled or at room temperature.

Pleasantville Note: Lobster is expensive. There’s no two ways around it. So make this for people you really, really like. For those you’re sort of iffy on, a great substitution would be a pound of small cooked shrimp.

Print Friendly

Caramelized Onions

The beauty of caramelized onions is not just in their delicious flavour, but their versatility. They are perfect for French Onion Soup, pastas, pizzas, toppings for burgers, sandwiches and even just a side. Here’s a simple recipe to follow that I’ve been using from Fine Cooking for years now. I try to always keep a batch on hand in the fridge. They take an hour or a little more to cook, so make them on the weekend when you have a little extra time. For the best way to slice an onion watch this great little tutorial.

Caramelized Onions

2 tbsps extra virgin olive oil
2 1/2 pounds Spanish onions or large yellow onions, peeled, trimmed, halved, and thinly sliced lengthwise
1 tsp kosher salt

Heat the oil in a 12-inch skillet over medium-high heat until it immediately bubbles when an onion touches it, about 1 minute. Add the onions, sprinkle with the salt, and cook, stirring frequently, until they wilt completely and begin to stick to the bottom of the pan, 10 to 20 minutes (much of the onions’ moisture will evaporate and the pan will begin to brown; the cooking time varies with the onions’ moisture content).

Reduce the heat to medium low and cook, stirring and scraping the pan with a wooden spoon every few minutes. (If the pan begins to look like it’s burning, add 2 tablespoons water, stir, and lower the heat a bit.) Cook, stirring, and scraping and adding water as needed, until the onions are a uniform, caramel brown, another 30 to 45 minutes. (If they haven’t begun to brown much after 20 minutes, raise the heat to medium.) Add a couple of tablespoons of water and scrape the pan well. Use right away or spread the onions on a baking sheet and let cool to room temperature. Store in the refrigerator for up to one week.

Pleasantville Note: Don’t be scared of the big heaping pile of onions in your pan. They will reduce significantly while cooking. Also, be very patient, you can’t rush caramelized onions.

Print Friendly

Naan Bread

My husband is adventurous in the kitchen where I am not. So, when he pulled out a recipe he found for Naan bread, I raised an eyebrow. “Don’t we need a tandoori oven or something like that?” I said. “Pshaw” he says, “let’s try it.” I’m glad he did because it’s delicious. And it’s really easy….because he makes it!

Naan Bread

2 1/4 teaspoons dry active yeast
1 cup warm water
1/4 cup sugar
3 tablespoons milk
1 egg, beaten
2 teaspoons salt
4 1/2 cups bread flour
1/4 cup butter melted

In a large bowl, dissolve yeast in warm water. Let stand about 10 minutes, until frothy. Stir in sugar, milk, egg, salt, and enough flour to make a soft dough. Knead for 6 to 8 minutes on a lightly floured surface, or until smooth. Place dough in a well oiled bowl, cover with a damp cloth, and set aside to rise. Let it rise 1 hour, until the dough has doubled in volume.

Punch down dough, and knead. Pinch off small handfuls of dough about the size of a golf ball. Roll into balls, and place on a tray. Cover with a towel, and allow to rise until doubled in size, about 30 minutes.

During the second rising, preheat grill to high heat.

At grill side, roll one ball of dough out into a thin circle. Lightly oil grill. Place dough on grill, and cook for 2 to 3 minutes, or until puffy and lightly browned. Brush uncooked side with butter, and turn over. Brush cooked side with butter, and cook until browned, another 2 to 4 minutes. Remove from grill, and continue the process until all the naan has been prepared.

Pleasantville note: This recipe was originally found on All Recipes. We removed the garlic it called for to keep it simpler. Also, when making this in the winter, feel free to use a grill pan on your stove top.

Print Friendly

Slow Cooker Apple Sauce

Fall is here and I die over all the delicious apples coming out. This apple sauce uses three different varieties and it delicious on it’s own (send with your kids for school), with pork, or my favorite with Cinnamon Belgian Waffles. Make this recipe before you go to bed and wake up to the delicious aroma of apples in your house.

5 medium Gala apples
2 medium Granny Smith apples
2 medium Honey Crisp apples
Fresh Lemon Juice
1/2 cup water
3/4 cup packed brown sugar
1/4 tsp cinnamon
1/4 tsp nutmeg
1/8 tsp allspice

Turn slow cooker to low. Peel apples with paring knife and cut off chunks directly into slow cooker. Squeeze fresh lemon juice on top and stir. Pour water over top. Leave on low for 6 to 8 hours. Stir in brown sugar and spices and cook for another half hour. Serve warm or store in airtight container in refrigerator for up to 2 weeks. Makes 8 servings.

Related Posts Plugin for WordPress, Blogger...
Print Friendly